Home

Seafood and Veggies Tempura

A Japanese dish consisting of battered and deep fried seafood and vegetables which is a family favourite aside from the famed sushi rolls.

Biko with a Twist

A Filipino sweet rice delicacy with an added twist -- leche flan on top instead of the usual caramel

Sweet and Sour Pork

A nice blend of sour and sweet to a marinated pork cubes will surely make you crave for more... a delish you can not say no!

Szechuan Beef Stir Fry

A no non-sense beef dish with 7 flavours present -- sour, pungent, hot, sweet, bitter, aromatic and salty

Turbo Roast Chicken in Soy, Lemon and Herbs

A recent favourite of my foodblog followers...the mixture of various herbs, lemon and soy makes this dish a great treat for no fuss cooks and eaters

Saturday, June 30, 2012

Easy and Simple Corned Beef Spaghetti

When my husband asked me what's for tea tonight, I told him ---Spaghetti honey!  Then he replied, "the sweet pinoy spaghetti?"  I said, "nope, just a bit of this and that kind of spaghetti" hehehhehe.  Although, he eats pinoy style spaghetti, I know he finds it sweet to his liking so this time I tried a different approach.  I had tins that I can use for the sauce...although no hotdogs.  He certainly fell in love with this simple and easy recipe that I made and even said I should do it again.

Ingredients
1/2 tin hamper or hormel tin corned beef
1/2 tin hamper or hormel tin ham (cubed)
1 medium onion (minced)
1 tsp garlic (minced)
1 carrot (minced)
1 tin mushroom (sliced)
1/2 c cream
1/2 c tomato sauce
2 tbsp tomato paste
1/3 c water
2 tsp italian seasoning
salt and pepper to taste
1/3 K spaghetti noodles (cooked according to packet instructions)

Procedure
Sautee onions and garlic. 
Stir in the carrots and mushrooms.
Add in the corned beef and ham.
Pour in water.
Add in the tomato sauce and paste.
Add the Italian seasoning.
Put in the salt and pepper.
Simmer.
Switch off the stove.
Pour in the cream and stir.
Serve with the noodles.
A comment or two will be appreciated...

Friday, June 29, 2012

Salmon Benedict by Denise M.

Salmon Benedict is a variation of the Eggs Benedict dish which originated in the US.  According to www.foodreference.com, there are two stories of the origin of this dish.  One is when honeymooners, Mr. and Mrs. Benedict, requested a new dish for breakfast at Delmonico's Restaurant in New York of which they are loyal patrons.  After discussing what they want to the maitre d' hotel, they came up with this dish.  The other story is about a certain Samuel Benedict requesting a dish that would cure his hangover.  Maitre d' hotel Oscar came up  with this dish.  From then on, it became famous and variations were made by people to enjoy this dish.

A former student of mine shared a photo in her wall at FB and I asked her if she could share with me the recipe of Salmon Benedict.  Here is her email:

from top to bottom:
1. chopped chives, for garnish
2. hollandaise sauce... i use a mix and i just add milk and butter to it then heat it up... knorr or mccormick, that's my secret! I know it sounds like cheating, but the easier to make it & the lesser ingredients needed, the more I would enjoy making it! If that's not available in Australia there's a good hollandaise sauce recipe from cooks.com http://www.cooks.com/rec/view/0,1655,128183-251198,00.html
3. poached eggs... i learned how to poach eggs through youtube! you'll need water (obviously, haha) and rice wine vinegar to do it! http://www.youtube.com/watch?v=KtZ14xEbgzg&feature=youtube_gdata_player
4. pre packaged smoked salmon... or you can also use deli ham or spinach as a vegetarian option... ive seen restaurants use steak too!
5. toasted bread... i usually use an english muffin for this recipe but we ran out that day that's why i used a loaf bread.

to assemble it...
1. make the hollandaise sauce, set aside
2. toast the bread then place the salmon on the bread
3. poach the egg then place it on top of the salmon
4. put the hollandaise sauce and garnish!

i hope i made it sound simple for you... i like making it coz its so easy! let me know how it turns out for u! goodluck! :)

www.cooks.com
Remove from heat and beat with a whisk until light. Stir in cayenne pepper, paprika and freshly chopped parsley, if desired.


A comment or two will be appreciated...

Thursday, June 28, 2012

Different Basic Dough Recipes

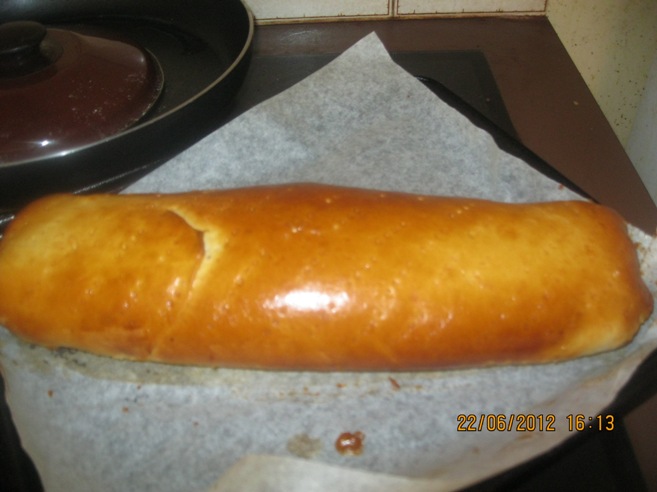
1.  Basic Bread Dough Recipe

Ingredients
450g (3 cups) plain bread flour (see note)
1 tbs (12g/2 sachets) dried yeast
2 tsp caster sugar
1/2 tsp salt
250ml (1 cup) warm milk
2 tbs melted butter

Procedure
Combine flour, yeast and sugar in a large bowl. Stir in salt. Make a well in the centre. Add milk and butter.
Use a wooden spoon to stir the mixture until well combined, then use your hands to bring the dough together in the bowl. Turn onto a lightly floured surface and knead for 10 minutes or until the dough is smooth and elastic.
Brush a large bowl with olive oil to grease. Place the dough in the bowl and cover with a damp tea towel. Set aside in a warm, draught-free place to prove for 45 minutes-1 hour or until the dough has almost doubled in size.
Punch down the centre of the dough with your fist. Turn onto a lightly floured surface. Knead for 2 minutes or until the dough is elastic and has returned to its original size.

2.  Basic Bread Dough (Happy Days with the Naked Chef by Jamie Oliver)

Ingredients
1kg strong bread flour
625ml tepid water
30g fresh yeast or 3 x 7g sachets dried yeast
 2 tablespoons sugar
1 level tablespoon fine sea salt
extra flour for dusting
Procedure
Stage 1: making a well
Pile the flour on to a clean surface and make a large well in the centre. Pour half your water into the well, then add your yeast, sugar and salt and stir with a fork.

Stage 2: getting it together
Slowly, but confidently, bring in the flour from the inside of the well. (You don't want to break the walls of the well, or the water will go everywhere.) Continue to bring the flour in to the centre until you get a stodgy, porridgey consistency – then add the remaining water. Continue to mix until it's stodgy again, then you can be more aggressive, bringing in all the flour, making the mix less sticky. Flour your hands and pat and push the dough together with all the remaining flour. (Certain flours need a little more or less water, so feel free to adjust.)

Stage 3: kneading!
This is where you get stuck in. With a bit of elbow grease, simply push, fold, slap and roll the dough around, over and over, for 4 or 5 minutes until you have a silky and elastic dough.

Stage 4: first prove
Flour the top of your dough. Put it in a bowl, cover with cling film, and allow it to prove for about half an hour until doubled in size – ideally in a warm, moist, draught-free place. This will improve the flavour and texture of your dough and it's always exciting to know that the old yeast has kicked into action.

Stage 5: second prove, flavouring and shaping
Once the dough has doubled in size, knock the air out for 30 seconds by bashing it and squashing it. You can now shape it or flavour it as required – folded, filled, tray-baked, whatever – and leave it to prove for a second time for 30 minutes to an hour until it has doubled in size once more. This is the most important part, as the second prove will give it the air that finally ends up being cooked into your bread, giving you the really light, soft texture that we all love in fresh bread. So remember – don't fiddle with it, just let it do its thing.

Stage 6: cooking your bread
Very gently place your bread dough on to a flour-dusted baking tray and into a preheated oven. Don't slam the door or you'll lose the air that you need. Bake according to the time and temperature given with your chosen recipe. You can tell if it's cooked by tapping its bottom – if it sounds hollow it's done, if it doesn't then pop it back in for a little longer. Once cooked, place on a rack and allow it to cool for at least 30 minutes – fandabidozi. Feel free to freeze any leftover bread.


3.  Basic Bread Dough (breadworld.com)
Ingredients
1-1 / 2 to 2 cups all-purpose flour
1 envelope yeast
2 teaspoons herb seasoning
3 / 4 teaspoon salt
2 / 3 cup very warm water (120° to 130°F)
1 tablespoon olive oil

Procedure
In a large bowl, combine 1 cup flour, undissolved yeast, herb seasoning, and salt. Gradually add very warm water and oil to flour mixture. Beat 2 minutes at medium speed of electric mixer, scraping bowl occasionally. Stir in enough remaining flour to make a soft dough. Knead on lightly floured surface until smooth and elastic, about 8 to 10 minutes. Cover; let rest 10 minutes.
Roll dough to 12 x 10-inch rectangle. Place on greased baking sheet. Layer filling ingredients lengthwise over center third of dough. With sharp knife, make cuts from filling to dough edges at 1-inch intervals along sides of filling. Alternating sides, fold strips at an angle across the filling. Cover; let rise in warm, draft-free place until doubled in size, about 45 minutes to 1 hour.

4.  Simple Dough Recipe (efoodi.com)
3 cups flour
3 cups lukewarm water
3 teaspoons sugar
3 teaspoons salt
2 teaspoons yeast (active dry)

Procedure
Heat the water until it is slightly warm to the touch, but not any more than that (it will kill the yeast).
Mix the water, sugar, and salt, and stir to dissolve.
Mix in the flour, 1/2 cup at a time. For the first two cups, add the flour very slowly (preferably with a sifter) and stir vigorously to ensure that it spreads throughout the liquid. For the last cup of flour, you can be more careless, since there's no risk of generating little localized pockets of flour.
Roll the dough out on a non-stick floured surface, and separate (or cut) into three roughly equal portions. Knead each vigorously for 5 minutes.
Place in an oven at 150 _Fahrenheit_ and let rise for 30-45 minutes; when it's done, you can quickly bake it as bread, or incorporate it into any other recipes you like.

A comment or two will be appreciated...

Wednesday, June 27, 2012

The Controversial Pan de Regla

When I posted in Facebook that I was baking Pan de Regla, I received comments immediately!  Some were curious and intrigued and the others started remembering what this bread is.  It's amazing to read their reactions to the name of this bread.  They began searching for pics and one of my friends and a former collegue even posted them on her FB wall.  They also shared the bread's different names --- kalihim, kabukiran, pan de pula, ligaya, floorwax etc.

When my husband asked what is the meaning of the name, I had to explain it hehehe...he said "of all the names, why that? yuuuck!" But what's in a name anyway?  As long as it tastes good, that's the important thing...and my husband proved it true...because he was the one who ate most of the bread.

Ingredients
no. 3 basic dough recipe
1 egg beaten for glace
Filling
7 pcs stale bread (edges removed)
1 1/2 c fresh milk
2 - 3 eggs
1/2 c granulated sugar
2 tsp vanilla
food color

Procedure
While the dough is set aside, start preparing the filling.
Pour in the milk in a bowl. 
Add in the rest of the ingredients (except bread and food color) and mix.
Add in the bread (just shred using your hands) and make sure that they absorbed the liquid.
If you have a food processor, puree the filling there. 
If you're using a blender, you need to use a colander with bigger holes to remove the tough bread.
You can also use your electric mixer and then use colander afterwards.
Transfer into a non stick pot and add the food color (half a teaspoon will do or you can add more if you want).
Put the stove on a low fire and keep stiring the filling mixture until it becomes thick.
Let it cool for a bit.
Transfer the filling in a cling wrap (length size of a ruler or a foot). 
Roll the filling and seal the cling wrap.
Refrigerate for until it sets.

Assembly
Roll out the dough (about 2 inches longer than the rolled filling).

Place the rolled filling in the middle of the flattened dough.
Fold the shorter sides of the dough.
Fold the longer sides of the dough towards the top covering the filling.
Seal with beaten egg.


Use a fork in making holes in the dough.


Brush with the beaten egg on both sides.
Place in a pan with the folded sides on the bottom.
Bake for 35 minutes in 180C or until the top looks like this.

A comment or two will be appreciated...

Adobong Pusit

Living far from the coast here in Australia means finding fresh seafood in the market would be difficult.  Being in the entrance of the outback makes it worst too.  How I wish I could buy fresh ones...just like the prawns, crabs, alamang, fish, squids etc. which you can find at the Hagonoy Market.  In our barrio, Sagrada, we would often just buy from those who would come to the house and sell u
s freshly caught seafoods and at a very fair price...you can haggle the price if you want too.  There is one seafood that I never failed to eat whenever it is on our table eversince I can remember --- Adobong Pusit.  My father would always be the one to cook this dish for us as he was the best cook in the family.  I remember him being so careful about not removing the blank ink which he said is the thing that really makes the pusit tastes better...adding a sweet taste to the dish.  Here in Australia though, aside from the difficulty of finding them, the squids that you can find at the shops would not have the black ink anymore.  I remember one time when we were in Emerald, Queensland for 4 months, I was able to get some with black ink still in them.  I was so happy and decided to cook half for adobo and the other for grilled pusit with tomatoes and onions.  My husband was so surprised that I did not remove the ink from the squids.  He never had squid dish with ink in the past so I told him to wait til he taste my squid dish.  I was so excited to see his reaction when he ate the adobo and hey!  He loved them!  He said they tasted different...a bit sweet and fresh.

Ohhh now, since I do not have fresh ones, the Saba Squid in tin will do then.  Good thing I was able to get them when we were at the Filipino store in Toowoomba.  We do not eat squid straight from the tin so I cook them the way I cook the fresh ones.  Although the taste is yummy, still nothing can beat the freshness of newly caught squids.

Ingredients
1 tin Saba squid in soy soy sauce or chillis or 1/2 K fresh squids
2 tbsp soy sauce (kikkoman)
1 medium onion, diced
2 cloves garlic, crushed
2 medium tomatoes, diced
1/3 c vinegar
1 tbsp sugar
salt and pepper to taste
(add a bit of water if you're using fresh squids or you can add sprite or 7-up instead of water)

Procedure
Heat oil in a pan. 
Sautee onions, garlic and tomatoes until they caramelised.
Add in the squid and stir until it absorbed the taste of the onions etc.
Add in the rest of ingredients.  Do not stir after you put in the vinegar.
Simmer.
Serve with rice.

A comment or two will be appreciated...

Tuesday, June 26, 2012

Cream Cheese Covered Brownies

Brownies are our family's fave anytime, anywhere and that's why it's nice to experiment each time you bake them.  This time I tried to dillute the sweetness of the brownies with the cream cheese mixture and it did work!  The marriage between the two made this goodies yummier.

Cream Cheese Mixture
3/4 c cream cheese, softened (easier if you use the one in jar)
45 g butter, softened
1/3 c granulated sugar
2 large eggs
3 tbsp plain flour
1 tsp vanilla

Brownies
You can use the ready mixed brownie
or use the following:
1 c plain flour
1/4 tsp salt
1/2 tsp baking powder
250 g chocolates
75 g butter
1/2 c cocoa
3 eggs
1 1/2 c granulated sugar
1 tbsp vanilla

Procedure
Cream Cheese
Cream butter and sugar.
Add in the cream cheese.  Mix until fluffy.
Add in eggs one at a time while mixing.
Add in the rest of the ingredients and mix until smooth.
Set aside.

Brownie
In a double boiler, melt together chocolates, cocoa, and butter.
Cool a bit.
In a bowl, mix together all the other ingredients.
Pour in the choco mixture onto the flour mixture.
Mix until well blended.

Place baking paper in a baking pan.
Pour the brownie batter into the pan.
Pour the cream cheese mixture on top of the brownie batter.  Make sure the chocolate batter is well covered.
Bake for 30 minutes in a 180C preheated oven.

.A comment or two will be appreciated...